Best eSIM for Japan 2026: Budget Traveler's Honest Guide
Best eSIM for Japan 2026 — Airalo, Holafly, or Saily? Honest comparison for budget travelers, how much data you actually need, and step-by-step setup before you fly.
The short answer: Airalo’s 10GB plan ($16–18) is the best eSIM for Japan for most budget travelers doing a 2-week trip. Skip unlimited — you almost certainly don’t need it, and it costs 3–5× more.
Japan is a destination where mobile data is not optional — it is infrastructure. You need it for Google Maps when a Tokyo station has 15 exits. You need it for Google Translate when an Osaka yatai menu has no English. You need it to check IC card balances, confirm overnight bus bookings, and look up the next Hakone ropeway departure time. Roaming plans are expensive. Airport SIM queues waste time. An eSIM set up before you fly solves everything.
This guide cuts through the marketing and tells you exactly what to buy, how much data to get, and how to set it up — matched to the budget Japan travel style this site is built around.
How Much Data Does a Japan Trip Actually Need?
Before comparing providers, this is the most important question — and the one that saves you the most money.
The average tourist in Japan uses 3–5 GB per week with normal navigation, translation, and social media. That’s the honest number — not the number that makes unlimited plans look good.
Realistic data usage for a budget Japan traveler:
| Activity | Daily data use |
|---|---|
| Google Maps navigation (online) | 50–150 MB |
| Google Translate (camera mode) | 30–80 MB |
| Messaging (WhatsApp, iMessage) | 20–50 MB |
| Social media (browsing, light posting) | 50–150 MB |
| Checking train times, booking apps | 20–40 MB |
| Occasional YouTube or streaming | 200–500 MB |
| Daily total (normal use) | 200–500 MB |
| 14-day trip total | 2.8–7 GB |
The practical conclusion: 10 GB covers a 2-week Japan trip for almost all budget travelers with room to spare. The only case for unlimited is if you’re a digital nomad working remotely (video calls, large file uploads) or posting travel videos daily. If you’re doing either of those things on a budget Japan trip, you’ve already researched this more than this guide covers.
The eSIM Comparison — 2026 Prices
Prices verified May 2026. Japan eSIM prices range from approximately $3.99 for a 1 GB short-trip plan to around $25 for a 20 GB 30-day plan — most travelers pay $10–$18 total for a one to two week trip with regular use.
Airalo — Best overall for budget travelers
Airalo wins for most travelers heading to Japan — it costs less, offers flexible data tiers from 1 GB to 20 GB, and connects to both SoftBank and KDDI, two of Japan’s three major carriers.
Airalo Japan plans (May 2026 pricing):
| Data | Duration | Price | Best for |
|---|---|---|---|
| 1 GB | 7 days | ~$4 | Short Tokyo-only trip |
| 3 GB | 30 days | ~$9 | 1-week light user |
| 5 GB | 30 days | ~$11 | 1-week moderate user |
| 10 GB | 30 days | ~$16–18 | 2-week trip (recommended) |
| 20 GB | 30 days | ~$22–26 | Heavy user or 3+ weeks |
Pros: Flexible plans, fast SoftBank/KDDI network, reliable in all major cities (Tokyo, Kyoto, Osaka, Fukuoka), no throttling until data runs out, hotspot sharing supported.
Cons: 4G LTE only — no 5G access. Slightly weaker rural coverage compared to NTT Docomo-based providers.
BudgetYen verdict: Buy the 10 GB / 30 day plan (~$16–18). It covers a 2-week trip with margin, is cheaper than buying two smaller plans, and performs reliably on every route covered in this guide — Tokyo, the overnight bus to Kyoto, Fushimi Inari, Osaka yatai stalls, Nara deer park, Hiroshima Peace Memorial, and Fukuoka.
Holafly — Skip it for budget trips
Holafly only sells unlimited plans. At $3.90 per day, Holafly is the most expensive Japan eSIM option — a 15-day trip costs $58.50 versus $16.99 for a 10 GB fixed plan from alternatives that covers the same period comfortably for most users.
Holafly doesn’t disclose their fair use policy threshold for Japan, so you don’t know exactly how much high-speed data you’re getting before throttling kicks in.
When Holafly makes sense: You’re a digital nomad doing video calls daily, uploading large files, or streaming video for more than 2 hours per day. For a budget sightseeing trip, you’re paying 3–4× more than needed.
BudgetYen verdict: Skip Holafly. At ¥150 = $1, the $40 you save by using Airalo instead of Holafly pays for an extra night in a Fukuoka hostel.
Saily — Good budget alternative
Built by the NordVPN team, Saily offers clean pricing and a smooth purchase experience. Saily stays competitive in the mid-range — pricing sits close to Airalo and Travelsim Asia across the board. One weakness: Saily uses SoftBank only — the weakest rural coverage of all providers listed.
Saily Japan plans (approximate):
- 1 GB: ~$4
- 10 GB: ~$16–18
- 20 GB: ~$22–25
Fine for Tokyo, Kyoto, and Osaka. Less ideal if your itinerary includes rural Hakone trails, mountain areas, or anywhere beyond major urban corridors.
Nomad — Best for multi-country Asia trips
Nomad offers competitive fixed plans and some of the best-value unlimited options — the real appeal is using one eSIM across your entire Asia trip, automatically switching to local networks as you cross borders without needing to install new eSIMs or juggle QR codes at each airport.
If your trip is Japan-only, cheaper options exist. If you’re doing Japan + South Korea + Taiwan or any multi-country Asia itinerary, Nomad’s single-plan convenience is worth the slight price premium.
Roafly — Best for rural Japan coverage
Roafly connects to NTT Docomo — Japan’s largest carrier, with the best rural coverage especially if your itinerary includes regional rail routes, smaller towns, or mountain areas outside the main metro corridors.
Tokyo-only travelers can get by on many networks. Wider itineraries reward stronger network selection.
When to choose Roafly: Your itinerary includes Hakone mountain trails, rural Kyushu, Hokkaido, or anywhere beyond the main Tokyo–Kyoto–Osaka–Fukuoka corridor. For the standard BudgetYen Japan route, Airalo performs fine.
Airport physical SIMs — Not recommended
Airport counter tourist SIMs run approximately ¥3,000 for short stays, while some larger packages at Narita can run ¥5,500–9,900 depending on validity and data volume.
The problems: you queue for 15–30 minutes at the airport when you’re tired, the prices are 30–50% higher than eSIMs for equivalent data, and you need to physically swap your home SIM (meaning you lose your home number temporarily). An eSIM set up before departure solves all three problems.
One legitimate exception: Android phones purchased outside Japan that don’t support eSIM profiles — in this case, a physical SIM at the airport from Sakura Mobile or IIJ is the most practical option.
The Provider Comparison at a Glance
| Provider | 10 GB price | Network | Rural coverage | Hotspot | Verdict |
|---|---|---|---|---|---|
| Airalo | ~$17 | SoftBank + KDDI | Good | ✅ | Best for most |
| Saily | ~$17 | SoftBank | Moderate | ✅ | Fine for cities |
| Roafly | ~$20 | NTT Docomo | Excellent | ✅ | Best rural Japan |
| Nomad | ~$22 | Multiple | Very good | ✅ | Best multi-country |
| Holafly | $58.50 (14 days unlimited) | KDDI + SoftBank | Good | Limited | Skip for budget |
iPhone vs Android — Critical Differences for Japan

iPhone users — the best Japan setup
iPhones from the iPhone 14 onwards are eSIM-only in some markets and support dual eSIM. The recommended setup for Japan:
- Keep your home eSIM for calls and SMS (so your home number stays active)
- Add an Airalo Japan eSIM as your data eSIM
- Set the Airalo eSIM as your “Primary” data line in settings
- Enable Express Transit for your Mobile Suica in Apple Wallet
This means you have your home number for calls, Japanese data for navigation, and Mobile Suica for all transport — all on the same phone with no physical SIM needed.
Mobile Suica reminder: Setting up Mobile Suica uses data during initial activation. Do this at home or on the airport Wi-Fi before switching to your eSIM. Full IC card guide: Suica vs ICOCA vs PASMO.
Android users — check eSIM compatibility first
Android phones outside Japan generally can’t use Mobile Suica, PASMO, or ICOCA apps — these require a FeliCa NFC chip found only in Japanese-market Android phones.
For eSIM connectivity however, most recent Android phones from major manufacturers (Samsung Galaxy S series, Google Pixel 6+, OnePlus) support eSIM and can use Airalo or Saily without issues.
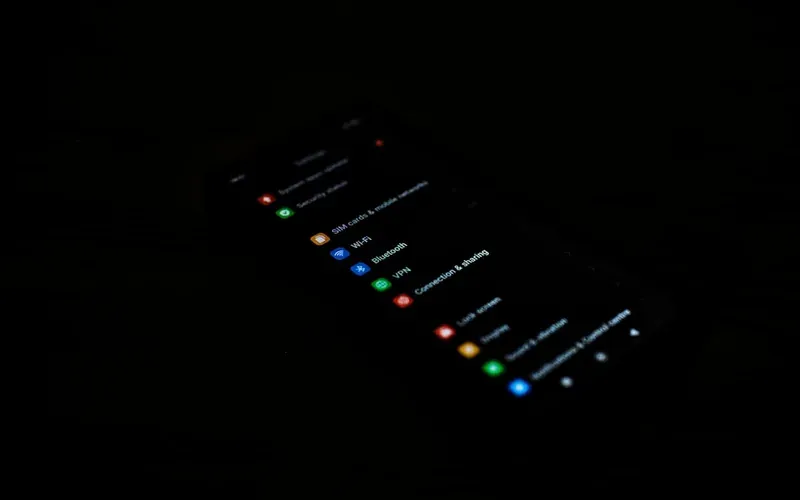
Check eSIM compatibility: Go to Settings → About Phone → look for “SIM Status” or “IMEI” — if you see “eSIM” or “IMEI2” listed, your phone supports eSIM. Alternatively, check your phone model on Airalo’s compatibility checker before purchasing.
Step-by-Step Setup Guide
Setup timeline (do this before you fly)
2–7 days before departure:
- Create an Airalo account at airalo.com
- Search “Japan” → select your data plan (recommended: 10 GB / 30 days)
- Complete purchase — receive QR code by email within minutes
- On iPhone: Settings → Cellular → Add eSIM → Use QR Code → scan the Airalo QR code
- On Android: Settings → Connections → SIM card manager → Add eSIM → scan QR code
- Name the eSIM “Japan Data” for clarity
- Do not activate it yet — keep the eSIM installed but set your home carrier as the active data line
On the plane or at the gate:
- Switch data to the Airalo Japan eSIM in Settings → Cellular
- Turn Data Roaming ON for the Japan eSIM
- Keep your home carrier eSIM active for calls and SMS only
When you land:
- Your Japan eSIM is already active — open Google Maps, confirm you have signal
- Start the trip
Download before you fly (saves significant data):
- Google Maps offline areas: Tokyo, Kyoto, Osaka, Nara, Hiroshima, Fukuoka
- Google Translate Japanese offline pack (for camera translation)
- Hyperdia or Navitime offline (Japan train routes)
- Your hostel addresses and booking confirmations (screenshot or download)
What if your eSIM doesn’t connect on arrival?
Connection happens when your device downloads a carrier profile — this tells your phone which network to use. If connection fails on landing, toggle Airplane Mode on and off, or go to Settings → Cellular → your Japan eSIM → and manually select the network (SoftBank or KDDI depending on your provider).
Most eSIM connection issues resolve within 5 minutes of landing. If still failing after 10 minutes, use the airport Wi-Fi to contact your provider’s support chat.
Airport SIM Kiosk vs eSIM — Full Comparison

| Factor | eSIM (Airalo) | Airport physical SIM |
|---|---|---|
| Price (10 GB / 2 weeks) | ~$17 | ¥5,500–9,900 (~$37–66) |
| Setup time | Done before you land | 15–30 min queue at airport |
| Connected immediately? | ✅ Yes | ❌ Wait in queue first |
| Keeps home number active? | ✅ Yes (dual eSIM) | ❌ Replaces your SIM |
| Works on older phones? | Requires eSIM support | ✅ Any unlocked phone |
| Refundable if unused? | ❌ No | Some providers yes |
The airport option makes sense only if: Your phone doesn’t support eSIM, or you’re buying a last-minute trip and don’t have time to set up in advance.
For everyone else — and for the budget travelers this site is written for — the eSIM saves both money and time.
How Much Data Each Japan Activity Uses
This is the practical guide for monitoring your data budget across a 2-week trip.
Heavy data days (over 500 MB): Arrival day (setting up, navigating from airport), day trips to new cities, any day with extended video calling or streaming.
Light data days (under 200 MB): Days spent walking free neighbourhoods (Yanaka, Shinsekai, Dotonbori), full konbini days where you’re not searching for restaurants, days in Nara or Hakone where you’re in nature rather than navigating complex transit.
The offline maps rule: Each city’s Google Maps offline area downloads between 300–800 MB once. Do all your offline map downloads on airport Wi-Fi or home Wi-Fi before activating your eSIM. This single step cuts your Japan data usage by 30–50%.
Monitor usage during your trip: On iPhone — Settings → Cellular → scroll down to see per-app usage since your last reset. Reset the counter when you activate your Japan eSIM so you’re measuring from day one. Set a reminder to check after the first 3 days to see if you’re on track.
Connecting Your eSIM to Your Japan Trip
Mobile data connects every part of a Japan budget trip:
Transport: Google Maps navigation in Tokyo’s 15-exit stations, checking IC card balances, confirming overnight bus departure times.
Food: Google Translate camera mode on konbini product labels and restaurant menus. Searching for the nearest ramen shop in Fukuoka. Reading the Osaka yatai menu in Dotonbori.
Activities: Checking Hakone ropeway Mount Fuji live camera, confirming Nara deer park opening hours, booking the Peace Memorial Museum timed entry online.
Accommodation: Hostel check-in confirmations, Booking.com for last-minute changes, WhatsApp to coordinate with travel companions.
Cost: Factor $17 for an Airalo 10 GB plan into the full Japan trip budget alongside accommodation, transport, food, and activities. At that price it’s genuinely one of the best-value items in your budget.

The eSIM Packing Checklist
Before you fly:
- Confirmed your phone supports eSIM (check model on Airalo’s compatibility page)
- Purchased Airalo 10 GB / 30 day Japan plan (~$17)
- Installed eSIM profile (scanned QR code, saved as “Japan Data”)
- Downloaded offline Google Maps for all cities on your itinerary
- Downloaded Google Translate Japanese offline language pack
- Set up Mobile Suica in Apple Wallet (iPhone users)
- Screenshotted hostel bookings and confirmation numbers
- Set eSIM to activate on arrival (not before — you pay from activation)
Full pre-trip checklist: Japan Budget Packing List.

Frequently Asked Questions
What is the best eSIM for Japan in 2026?
For most budget travelers doing a 2-week Japan trip, Airalo’s 10 GB / 30-day plan (~$17) is the best value. It connects to SoftBank and KDDI (two of Japan’s three major networks), has no throttling until data runs out, and covers 2 weeks of normal sightseeing use — maps, translation, and messaging — with margin to spare.
How much data do I need for 2 weeks in Japan?
Most tourists use 3–5 GB per week, meaning 10 GB is sufficient for a 2-week trip with regular navigation and translation use. Downloading offline Google Maps for each city before departure reduces this further. Unlimited plans are only necessary for digital nomads doing video calls or uploading large files daily.
Is Holafly worth it for Japan?
For budget travelers, no. Holafly’s unlimited plans cost $27.30 for 7 days or $74.90 for 30 days — significantly more expensive than fixed-data alternatives for typical tourist use. The average Japan tourist uses 3–5 GB per week, making a 10 GB fixed plan from Airalo (~$17) far better value for a 2-week trip.
Can I use an eSIM in Japan with an iPhone?
Yes. All iPhones from the iPhone XR onwards support eSIM. iPhones 14 and later (purchased in North America) are eSIM-only with no physical SIM tray. Install your eSIM plan before departure via QR code scan in Settings → Cellular → Add eSIM. iPhone users can also add Mobile Suica to Apple Wallet for all transport payments, eliminating the need for a physical IC card.
Can I use an eSIM in Japan with an Android phone?
Most modern Android phones (Samsung Galaxy S series from S21+, Google Pixel 6+, and most flagship phones from 2022 onwards) support eSIM. Check your specific model on the Airalo compatibility page before purchasing. Note: most Android phones purchased outside Japan do not support Mobile Suica — use a physical IC card instead for transport.
Should I buy a SIM card at the airport in Japan?
Airport SIM cards at Narita and Haneda cost ¥3,000–9,900 ($20–66) for equivalent data — 30–50% more expensive than buying an eSIM online in advance. Airport queues typically run 15–30 minutes on arrival. An eSIM purchased beforehand is cheaper, activates instantly when you land, and keeps your home phone number active. The airport physical SIM is only recommended if your phone doesn’t support eSIM.
Does the eSIM work in Nara, Hakone, and rural Japan?
Airalo’s SoftBank and KDDI networks provide good coverage in major cities and most tourist routes including Nara, Hakone, Hiroshima, and Fukuoka. For more rural itineraries (Hokkaido, mountain areas beyond the main tourist circuit), Roafly’s NTT Docomo network offers better coverage. For the standard BudgetYen Japan route, Airalo performs reliably everywhere.
Prices verified May 2026. eSIM prices change frequently — check provider websites for current rates before purchasing.